2.1.1 How to add tags to a contact upon a successful purchase
The Connector Wizard plugin allows you to automatically add tags to a contact in your CRM when they purchase a product from your WooCommerce store. This helps you easily segment customers and trigger automations based on their purchase behavior.
Follow the steps below to add tags upon a successful purchase:
Step 1: Edit the Product
- Log in to your WordPress admin dashboard.
- Go to Products > All Products.
- Edit the product for which you want to configure tags.
Step 2: Open Connector Wizard Settings
- Scroll down to the Product data section.
- Click on the Connector Wizard tab from the left-hand menu (see screenshot).
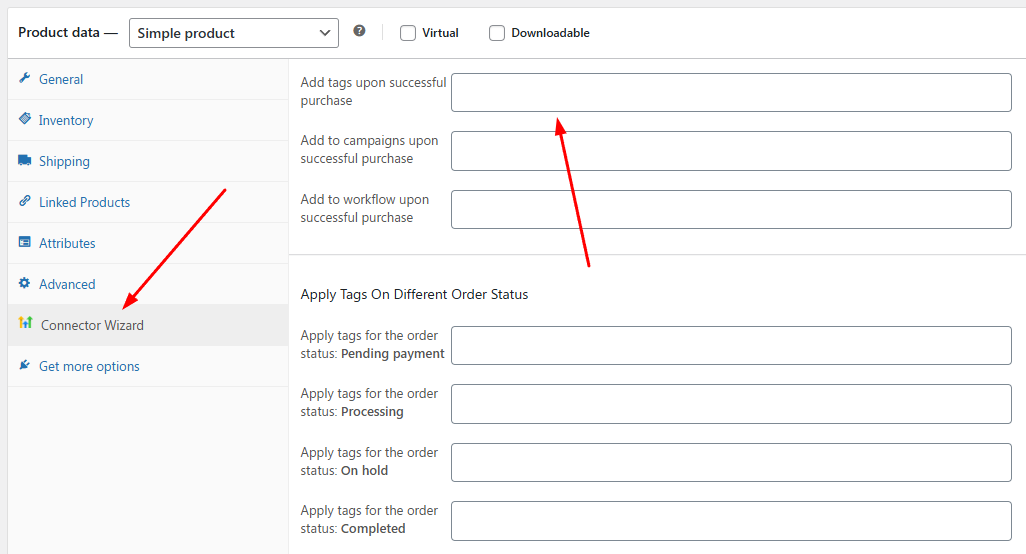
Step 3: Add Tags Upon Successful Purchase
- Locate the option Add tags upon successful purchase.
- Enter the tags you want to assign to the contact after they successfully purchase this product.
Example:VIP-Customer,Course-Buyer,Subscribed - You can add multiple tags on one product.
Step 4: Save the Product
- After adding your desired tags, scroll up and click Update (or Publish, for new products).
- The settings will be saved automatically.
Result
When a customer successfully purchases this product, the specified tags will be added to their contact profile in your connected CRM.
Tip: You can also check these two related docs about applying tags:
